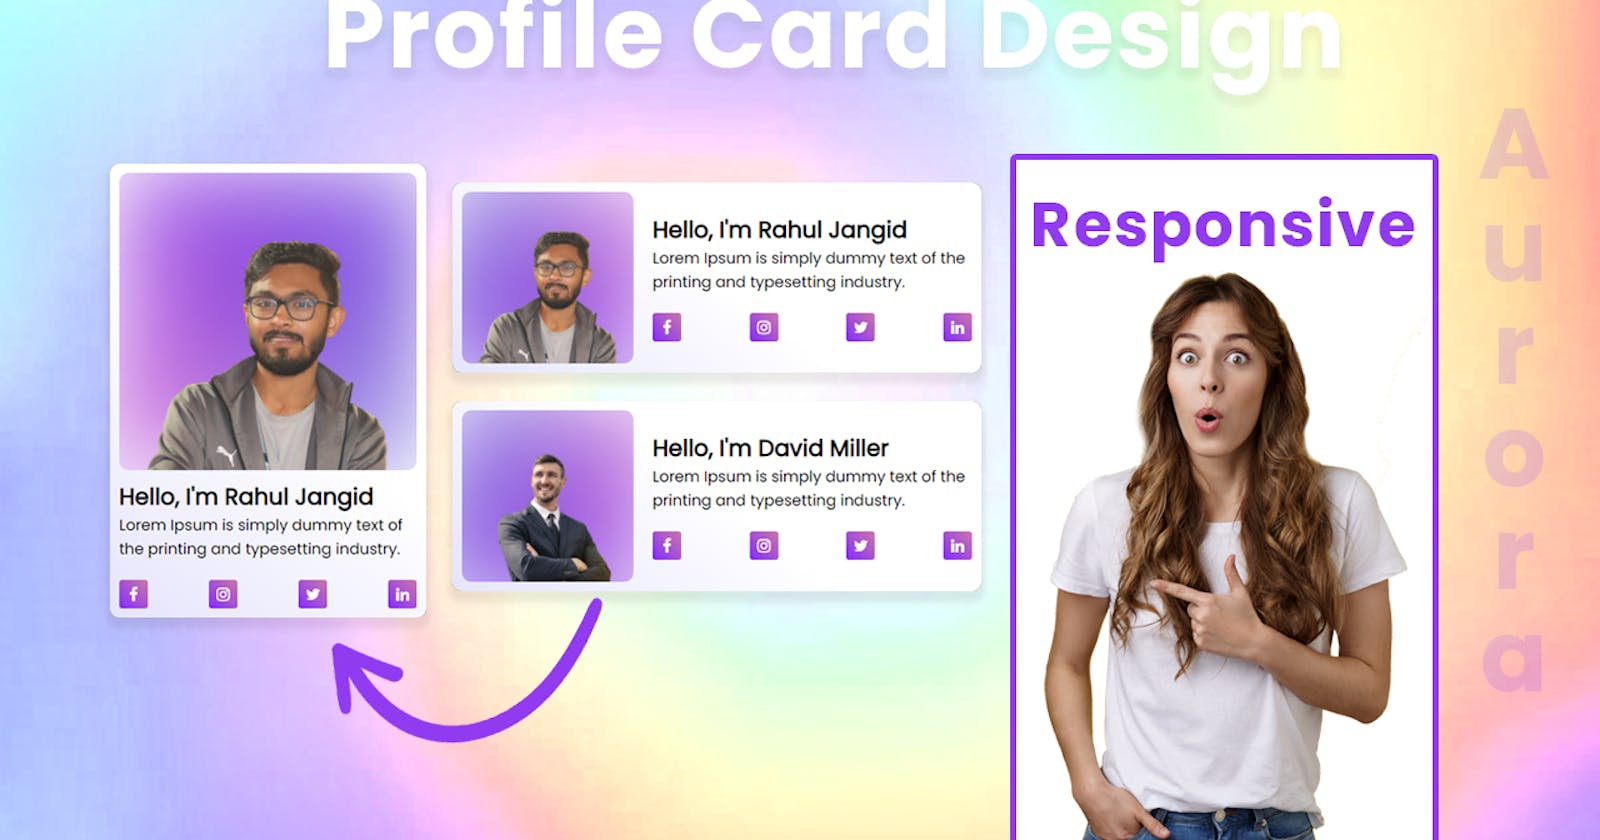
Hello guys, today I am going to show you how to to create a awesome aurora profile card design, in this article i will create a responsive profile card design with simple aurora background animation using HTML & CSS.
Profile Card Design 2021 step by step
In this step, we need to create a new project folder and files(index.html, style.css) for creating a profile card design. In the next step, you will start creating the structure of the webpage.
Step 2 — Setting Up the basic structure
In this step, we will add the HTML code to create the basic structure of the project.
<!DOCTYPE html>
<html lang="en">
<head>
    <meta charset="UTF-8">
    <meta http-equiv="X-UA-Compatible" content="IE=edge">
    <meta name="viewport" content="width=device-width, initial-scale=1.0">
    <title>How to Awesome profile Card Design</title>
    <link rel="stylesheet" href="style.css">
    <link rel="preconnect" href="https://fonts.googleapis.com">
    <link rel="preconnect" href="https://fonts.gstatic.com" crossorigin>
    <link href="https://fonts.googleapis.com/css2?family=Poppins:wght@200;300;400&display=swap" rel="stylesheet">
    <link rel="stylesheet" href="https://cdnjs.cloudflare.com/ajax/libs/font-awesome/4.7.0/css/font-awesome.min.css">
</head>
<body>

</body>
</html>
This is the base structure of most web pages that use HTML.
Add the following code inside the <body> tag:
<div class="container">
    <div class="cards grid-row">
      <div class="card flex-row colmun">
        <div class="col-left card-image">
          <div class="card-bg-img">
            <img src="purple.jpg" alt="card background image">
          </div>
          <div class="profile-img">
            <img src="profile.png" alt="profile">
          </div>
        </div>
        <div class="col-right card-info">
          <div class="card-info-inner">
            <h2>Hello, I'm David Miller</h2>
            <p>Lorem Ipsum is simply dummy text of the printing and typesetting industry.</p>
            <ul class="social">
              <li><a href="#"><i class="fa fa-facebook"></i></a></li>
              <li><a href="#"><i class="fa fa-instagram"></i></a></li>
              <li><a href="#"><i class="fa fa-twitter"></i></a></li>
              <li><a href="#"><i class="fa fa-linkedin"></i></a></li>
            </ul>
          </div>
        </div>
      </div>
      <div class="card flex-row colmun">
        <div class="col-left card-image">
          <div class="card-bg-img">
            <img src="purple.jpg" alt="card background image">
          </div>
          <div class="profile-img">
            <img src="rahul.png" alt="rahul">
          </div>
        </div>
        <div class="col-right card-info">
          <div class="card-info-inner">
            <h2>Hello, I'm Rahul Jangid</h2>
            <p>Lorem Ipsum is simply dummy text of the printing and typesetting industry.</p>
            <ul class="social">
              <li><a href="#"><i class="fa fa-facebook"></i></a></li>
              <li><a href="#"><i class="fa fa-instagram"></i></a></li>
              <li><a href="#"><i class="fa fa-twitter"></i></a></li>
              <li><a href="#"><i class="fa fa-linkedin"></i></a></li>
            </ul>
          </div>
        </div>
      </div>
    </div>
  </div>
Step 3 — Adding Styles for the Classes
In this step, we will add styles to the section class Inside style.css file
* {
  padding: 0;
  margin: 0;
  box-sizing: border-box;
  font-family: 'Poppins', sans-serif;
}
body {
  display: flex;
  align-items: center;
  justify-content: center;
  height: 100vh;
  width: 100vw;
  overflow-x: hidden;
  background: #d9eaff;
}
.container {
  width: 95%;
  max-width: 1140px;
  margin: auto;
}
.grid-row {
  display: grid;
  grid-template-columns: 1fr 1fr;
  column-gap: 30px;
}
.flex-row {
  display: flex;
  align-items: center;
  column-gap: 20px;
}
.card {
  padding: 10px;
  background: rgb(229,228,252);
  background: linear-gradient(
38deg
, rgba(229,228,252, 1), rgb(255 255 255) 51%);
  border-radius: 10px;
  box-shadow: 0px 0px 10px rgb(0 0 0 / 10%);
  margin-bottom: 20px;
}
.card-image {
  position: relative;
  overflow: hidden;
  border-radius: 10px;
}
.card-bg-img img {
  display: block;
  width: 100%;
  max-width: 200px;
  border-radius: 10px;
  animation: scaleAnim 10s ease-in-out infinite;
}
@keyframes scaleAnim {
  0% {
    transform: scale(1);
  }
  50% {
    transform: scale(1.5) rotate(360deg);
  }
  100% {
    transform: scale(1) rotate(0deg);
  }
}
.card-bg-img {
  filter: blur(50px);
}
.flex-row > div {
  min-width: 180px;
}
.profile-img {
  position: absolute;
  top: 0;
  bottom: 0;
  left: 0;
  right: 0;
}
.profile-img img {
  display: block;
  width: 100%;
  height: auto;
  object-fit: cover;
}
.social {
  list-style: none;
  display: flex;
  align-items: center;
  justify-content: space-between;
  margin-top: 20px;
}
.social li {
  width: 30px;
  height: 30px;
  display: flex;
  align-items: center;
  justify-content: center;
  background: linear-gradient(
45deg
, #832dff, #c7a);
  border-radius: 3px;
}
.social li a {
  color: #fff;
}

@media screen and (max-width: 1060px) and (min-width:900px) {
  h2 {
    font-size: 20px;
  }
  p {
    font-size: 14px;
  }
}

@media screen and (max-width: 899px) and (min-width:768px) {
  .flex-row > div {
    min-width: 150px;
  }
  h2 {
    font-size: 16px;
  }
  p {
    font-size: 12px;
  }
}
@media screen and (max-width: 767px) and (min-width:521px) {
  .grid-row {
    display: block;
  }
}
@media screen and (max-width: 520px) and (min-width:200px) {
  .grid-row, .flex-row {
    display: block;
  }
  .card-bg-img img {
      max-width: unset;
  }
  .card-info-inner {
      display: block;
      margin-top: 10px;
  }
}

